Forum archiveWorkshop Manual
This is a read-only archive of the ST70.net forum (2009–2021). Posting, accounts and private messages are no longer available.

The Project Has Started...

Started by James · 121 replies · 43916 views

JamesModeratorPosts: 423
Joined: Feb 2009
Re: The Project Has Started...
Update

The bike is pretty much finished but have a few BIG problems resulting in the engine not starting.

Here is my list of problems:

1). Either the battery is knackered (I had it on charge for a few hours and it's only a couple of years old) or there is a problem with the wiring as I have no electrics. Sadly I don't have a multimeter to check the voltage.
2). The carb leaks... badly. I need a new gasket but you have to buy them in a set meaning it will cost over £20. Has anyone got a spare one I can buy off them? I only need the small one.
3). The bike won't start and I'm not sure why. Haven't checked for a spark as I can't find my spark plug spanner.

Got a new number plate today and some new oil, was hoping to get the bike MOT'd this week or next but unless I get these problems fixed it's not going anywhere. After all the effort I have put in I am so tempted to just put it away and not bother! I have spent hours on this thing and I can't figure it out :(
TUFTYNUTKINStandard MemberPosts: 456
Joined: Mar 2009
Re: The Project Has Started...
Hi James
Sorry to hear that you are having a bad day can you break the problems down into individual parts IE battery you could test it simply by putting the headlamp bulb across it and leave it to see if it can firstly light the lamp and secondly can it keep it lit for any length of time better still use the tail light bulb. The carb leak you need to be more specific which gasket and expand on no electrics, I got home friday night from being away all week to find that the condenser I had ordered was the wrong style (it was a pattern part ) and would not locate into the recess so I ordered one from DAVID SILVER (should have done this to start with ) but it wont be here till Tuesday Wednesday and I go away again Wednesday morning. Dont give up I only found the correct wiring diagram for my Lady in the back of the owners manual which I got from Ebay, having built my own car this should be easy but can be very frustrating but wood for the trees takes over.
Best of luck,
Tufty
Last edited by TUFTYNUTKIN on Sun May 10, 2009 8:25 pm, edited 1 time in total.
TUFTYNUTKINStandard MemberPosts: 456
Joined: Mar 2009
Re: The Project Has Started...
Hi James
Me again remember on the electrics you only get the neutral light and brake light without the engine running (forgot that myself) hope this helps.
Dont forget next weekend is the BMF show in Peteborough, check it out on the web.
Tufty
JamesModeratorPosts: 423
Joined: Feb 2009
Re: The Project Has Started...
TUFTYNUTKIN wrote:Hi James
Sorry to hear that you are having a bad day can you break the problems down into individual parts IE battery you could test it simply by putting the headlamp bulb across it and leave it to see if it can firstly light the lamp and secondly can it keep it lit for any length of time better still use the tail light bulb. The carb leak you need to be more specific which gasket and expand on no electrics, I got home friday night from being away all week to find that the condenser I had ordered was the wrong style (it was a pattern part ) and would not locate into the recess so I ordered one from DAVID SILVER (should have done this to start with ) but it wont be here till Tuesday Wednesday and I go away again Wednesday morning. Dont give up I only found the correct wiring diagram for my Lady in the back of the owners manual which I got from Ebay, having built my own car this should be easy but can be very frustrating but wood for the trees takes over.
Best of luck,
Tufty
Thanks for the message and the advice Tufty. I will try and break the problems down a bit better.
I topped the battery up with distilled water and charged it for about 3-4 hours and then put it on the bike, connected it up, switched the ignition on and there was no light. Made sure the bike was in neutral and also tried both front and rear brakes.
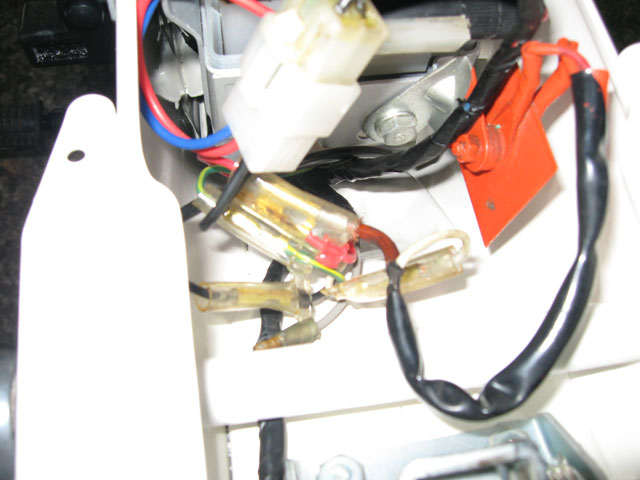
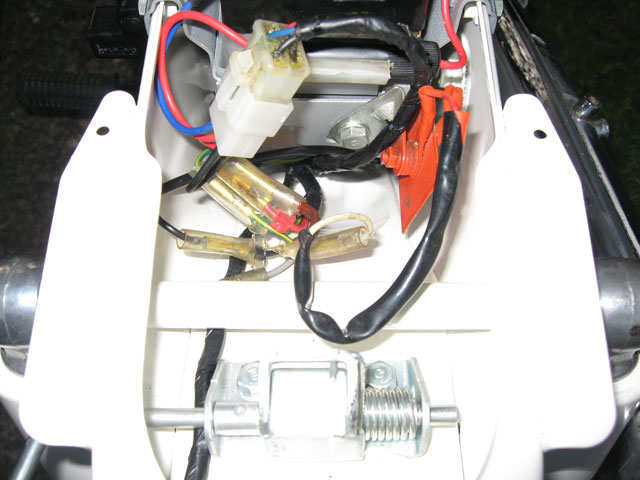
My dad seems to think it might be the battery but I disagree as it's only a few years old and I know it was good last year. I am worried I might have the bike wired up wrong or I have damaged a wire (doubtful). I have taken a couple of photos of the wiring that is by the battery. Can someone take a look and let if me know if it looks correct?
Here are the pictures:


I am going to buy a new battery anyway just as a process of elimination but the website where I bought the last one (Monkey Bike UK) isn't working properly and won't allow me to buy one! I will phone them tomorrow at work and do it over the phone.

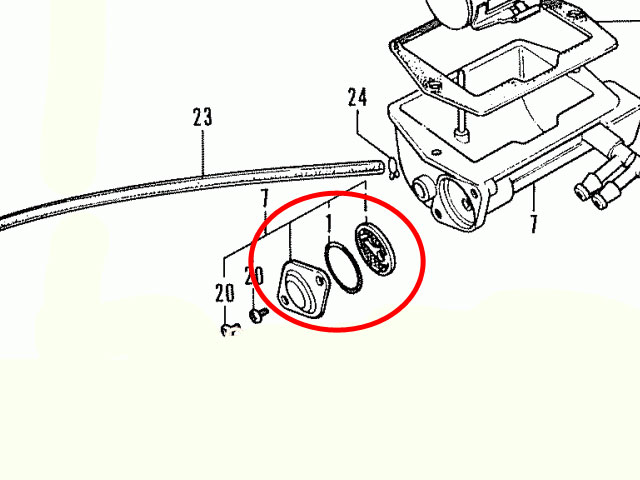
The other problem is the fuel leak. I have circled the part of the carb which is leaking in he diagram below:


I think the gasket is perished but can't get the screws off to check.

As for the bike not starting, I couldn't check to see if the plug was wet or not but I think I know where my plug spanner is now but it's a pain to get out (back of the shed full of junk). I might check that when I next get to work on the bike (next weekend). I doubt I am getting a spark to be honest (so brings me back to my electrical issue).

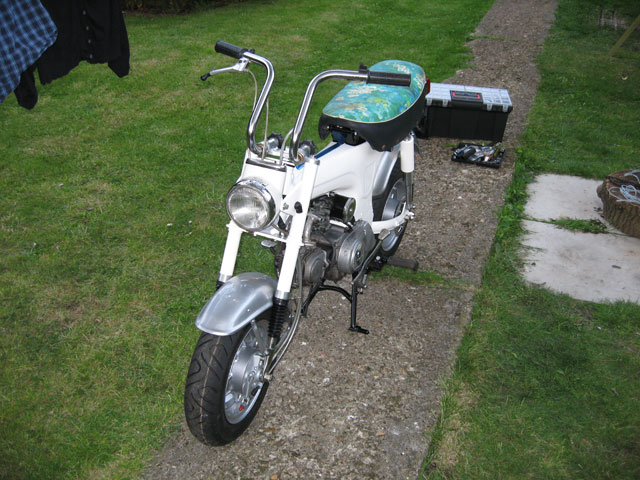
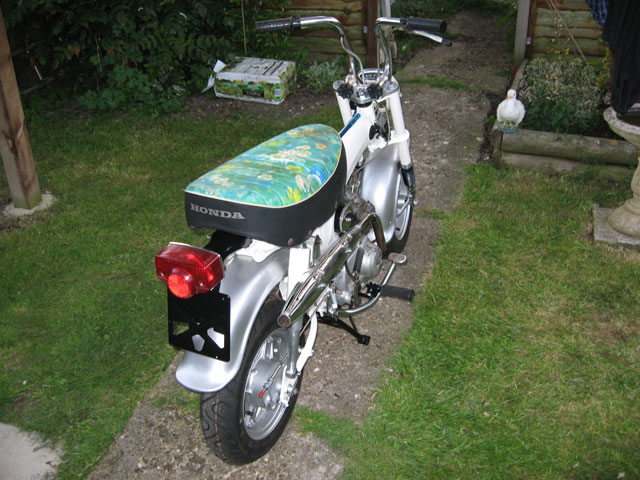
Anyway, here are some pics of the bike so far:


Thanks :)
TUFTYNUTKINStandard MemberPosts: 456
Joined: Mar 2009
Re: The Project Has Started...
Hi James
The battery is wired the same as mine which is right according to the diagram in my 74 owners manual what is the yellow stuff in the back of the connector also I will post you some different size O rings to sort out your leak. You have my email address so send me your home address and I will post them to you. On the Lady front it is looking great so dont give up just sort the problems into small do-able issues
Tufty
JamesModeratorPosts: 423
Joined: Feb 2009
Re: The Project Has Started...
TUFTYNUTKIN wrote:Hi James
The battery is wired the same as mine which is right according to the diagram in my 74 owners manual what is the yellow stuff in the back of the connector also I will post you some different size O rings to sort out your leak. You have my email address so send me your home address and I will post them to you. On the Lady front it is looking great so dont give up just sort the problems into small do-able issues
Tufty
Hi Tufty,

The yellow stuff is grease (I think). It's always been in there and I have never cleaned it out. I think it's to stop the water getting in and corroding the ends of the wires.

Many thanks for your generous offer, I have sent you my address in an email.

Don't worry, I won't give up. You're right, I just need to break down all the issues and fix them one by one. I am sure it's probably something simple like a dodgy battery causing the electrics issue but at least now I have some things to go on and also I will be able to fix the fuel leak :)

I need to order some stickers/graphics for the bike. Where did you get yours from may I ask?

Thanks

James
WaynusModeratorPosts: 1108
Joined: Feb 2009
Re: The Project Has Started...
Hi James,
first of all, the battery nor all the lighting wires have nothing to do with the ignition/spark.
These are two completely seperate circuits.

The only thing you need is the black wire from your ignition (flywheel) which goes to you ignition coil.
Since the engine was running before dismounting and the frame has been repainted, the first and most obvious issue to sort out is to check if the ignition coil is grounded to the frame. (removing some paint at the mounting bolts of the ignition coil could be necessary)
If that's OK, check the ignition wire for breakage (again, not just look, but measure!)

If everything is OK, check if the flywheel/ignition still generates electricity.
And work all the way up from there.

Once the bike is running, you can start checking the engine for the lights, horn,...

And indeed, only the stop light and the horn use the batteries electricity.

btw: the bike is really looking beautiful!!!
JamesModeratorPosts: 423
Joined: Feb 2009
Re: The Project Has Started...
Waynus wrote:Hi James,
first of all, the battery nor all the lighting wires have nothing to do with the ignition/spark.
These are two completely seperate circuits.

The only thing you need is the black wire from your ignition (flywheel) which goes to you ignition coil.
Since the engine was running before dismounting and the frame has been repainted, the first and most obvious issue to sort out is to check if the ignition coil is grounded to the frame. (removing some paint at the mounting bolts of the ignition coil could be necessary)
If that's OK, check the ignition wire for breakage (again, not just look, but measure!)

If everything is OK, check if the flywheel/ignition still generates electricity.
And work all the way up from there.

Once the bike is running, you can start checking the engine for the lights, horn,...

And indeed, only the stop light and the horn use the batteries electricity.

btw: the bike is really looking beautiful!!!
Thanks Waynus!

I ordered a new battery this morning so might have it tomorrow, if so I will get chance on wednesday evening to try it. Do you mean the ignition coil under the fuel tank?! The bolts were masked etc so there should be a good earth there, although something worth checking.

I do remember the spark plug boot coming off during the rebuild, I pushed it back on, could this be an issue? Obviously the best way to check is to get the plug out and see if I am getting a spark (need to find my spark plug spanner).

The fact that there is no electrics when I switch it on will mean it's either the battery, a wiring fault or it's not grounded right? At least on Wednesday I will be able to eliminate the battery being an issue!

Tufty is going to send me an o-ring to fix the leak which is very kind of him. After a busy weekend working on the bike it's so frustrating when it doesn't work! I was hoping it was going to fire into life 2nd kick lol.
WaynusModeratorPosts: 1108
Joined: Feb 2009
Re: The Project Has Started...
Yes, the ignition coil under your tank.
The earthing is easy to check, and if there is no blanco metal under the coil/near the bolts, the coil can't be earthed.

Second, the spark plug boot has to be screwed on the wire, not pushed on it.
You can test for sparks without the boot and plug as well.
Just lay the wire on the cilinder, it should spark just as it would with the plug.
TUFTYNUTKINStandard MemberPosts: 456
Joined: Mar 2009
Re: The Project Has Started...
Hi James
Bits went in the post today, one will do the trick also the plug top should screw on not push ,also decals are from http://WWW.EBAY.COM there is an item no 120416017239 dont forget the BMF show this weekend where most of the old stands will be there so you might strike lucky only downside is £16.00 entry and drive to Peteborough, also yellow stuff is probably Vaseline.Unfortunately there are 3 ignition coils depending on which translation you have,1 is the coil under the fuel tank 2 is the condenser under the magneto rotor looks the same as one on your dads old car which protects the points from premature failure also there is the coil of which there are 2 that look the same (copper wire wound about 2 cm x 7.5 cm also under the magneto rotor) one of these is to charge the battery and the other provides power for lighting also yesterday I forgot to mention the battery also provides power for the horn without the engine running.
Regards Tufty

‹ Back to Bike Chat