TozziStandard MemberPosts: 11
Joined: May 2013
Joined: May 2013
Hi everyone
I'm Daniel. New to the honda mini-bike scene but not so new to the pit bike scene.
I hope to meet some new friends and mini bike fanatics. I'm always looking to help where I can, all your feedback and insight would be great!!
Having owned 4 pit bikes 3 in the past and one currently I defiantly knew my way around the problems these bikes commonly suffer and didn't find servicing and modifying at all difficult. Have always loved the simplicity of mini bikes and pit bikes.
Still have a tonne of parts in the shed, enough to build a bike. But I'm no bike restorer/builder
-1st gen atomik 125cc semi auto (ducar engine) talking mid (2005)
-provert 140cc (2006) manual
-assassin 140cc (2010)
-atomik nitrous 160cc (my current bike) (2012)
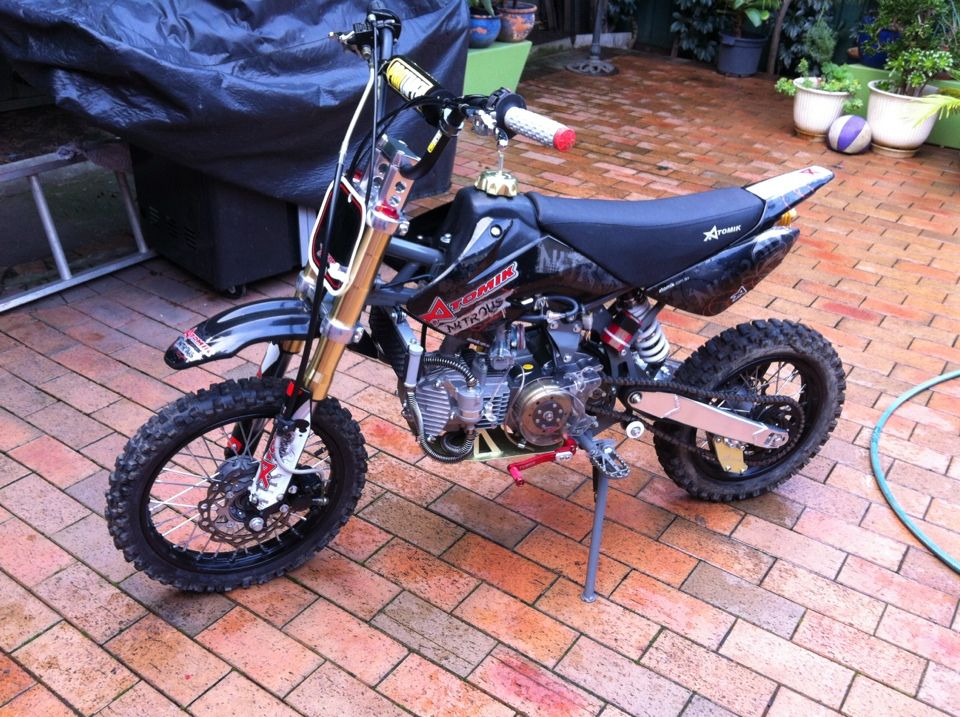
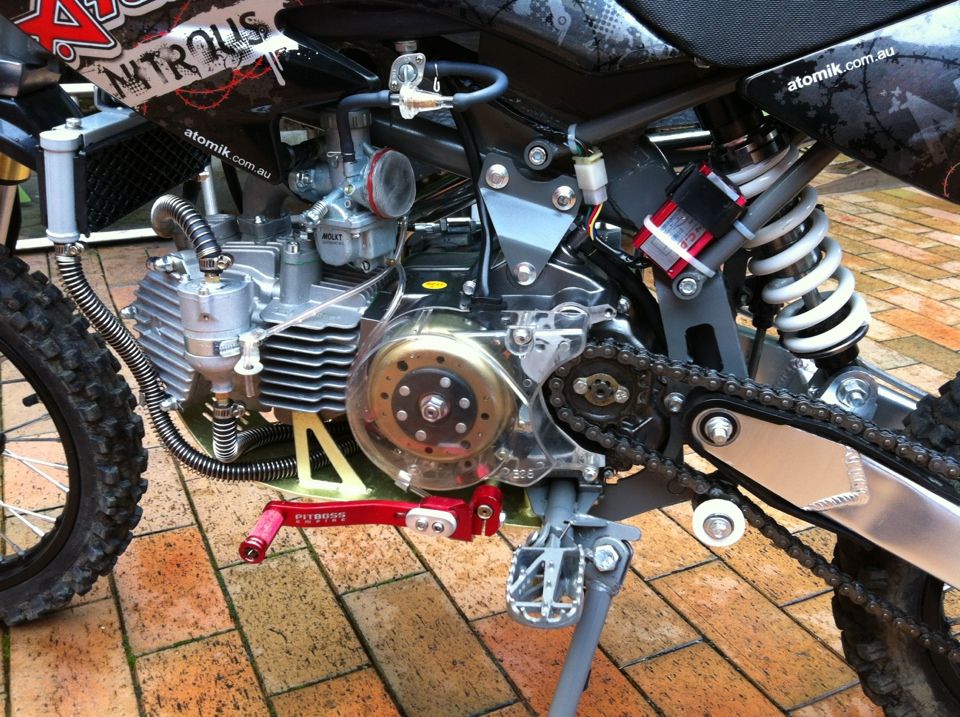
About a month ago I happened to be on the market for a motovert rx125 which I was going to register and modify to be a fun little suburban machine, until I found what was to be a 1974 Honda ct70.

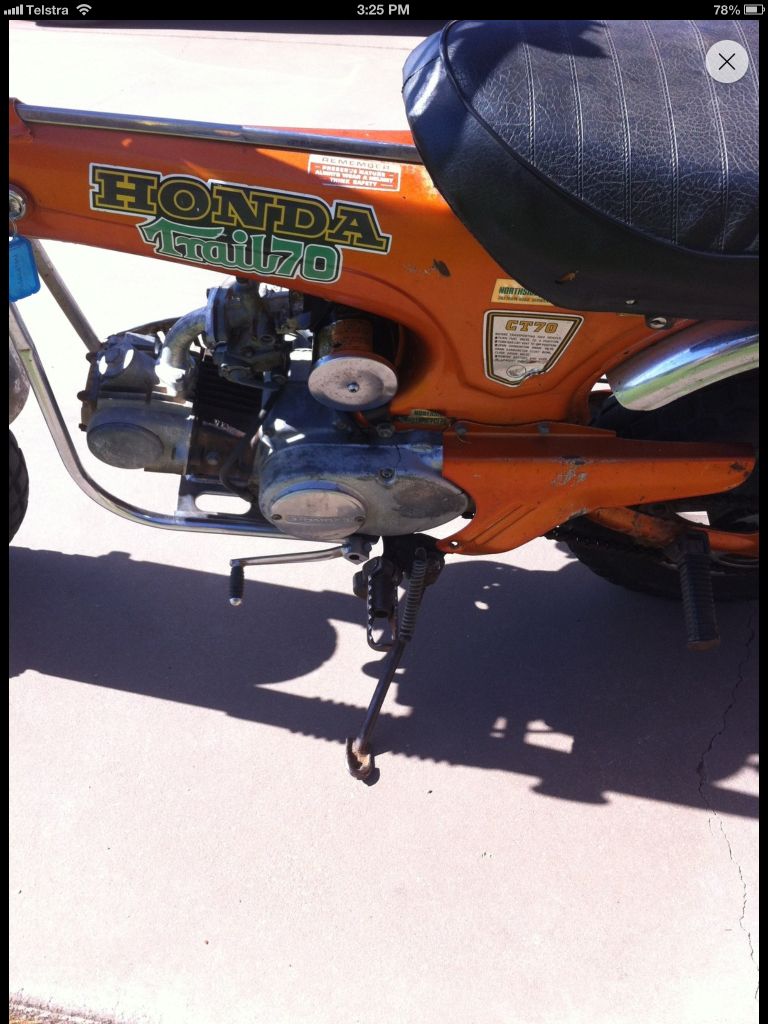

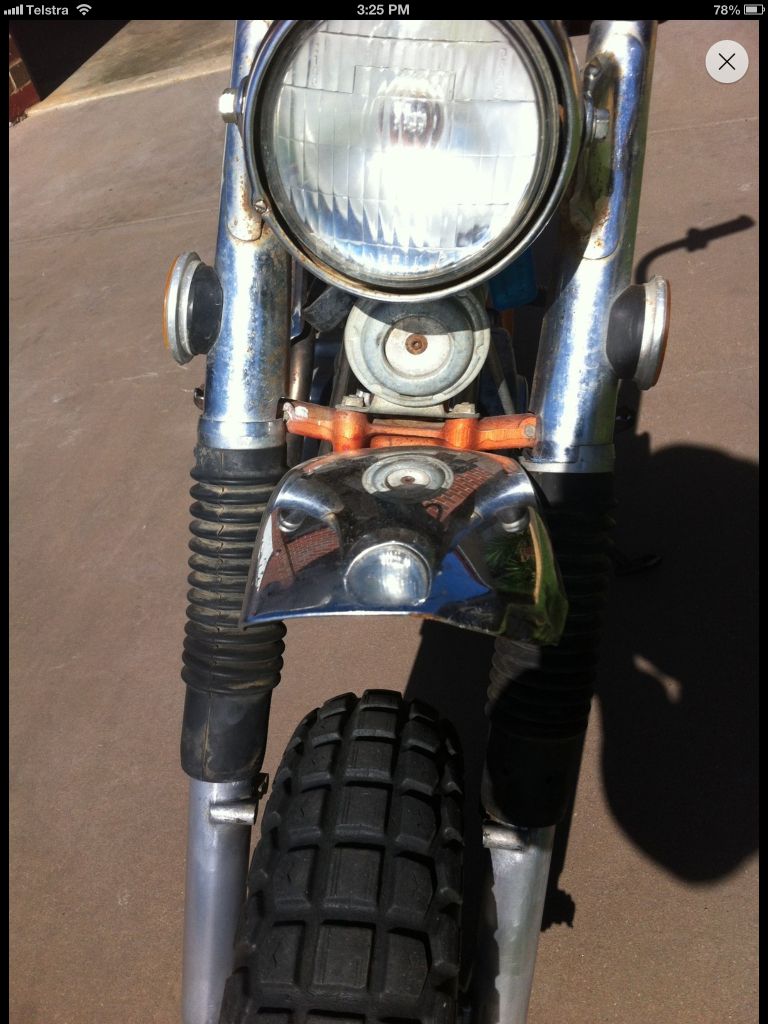
I hadn't ever seen anything quite like it. It was new to my eyes and I simply couldn't stop looking at its potential. I always knew about the z50s but never these things!
I searched them up on google, and found that there was a huge market for these overseas and they were road registrable. Further research lead me to find some cool forums such as this one. I was defiantly keen on showing everyone what I can do. Seeing as though there's a huge scene on vintage honda minis.
After I saw the huge amount of parts on the market I was now well off the idea of the motovert and had to have this ct70. So this would be my first ever restoration project and build.
The particular one I was looking at was on eBay. Still 3 days remaining and I was worries as there were 33 bidders already. Keeping my head high I placed my highest bid and 3 days later I had won the bike only just.
I was now the owner of a k3 1974 candy topaz orange ct70
But the bike was in Wagga Wagga and I'm in sydney so it wasn't going to be a trip in the park pick up. My 4wd was off at the mechanics until the following week and I defiantly didn't want to wait that long.
Planned the trip for that Saturday and left for Wagga at 6am. Other than hitting a wombat at highway speed and blowing a tyre at goulburn. The trip in my dads 1986 Toyota hilux automatic 3 speed (scrap metal ute) was ok. Oh what the hell!!
Let me just say, I won't do a drive like that again without the comfort of cruise control and the peace and quiet of new door and window seals hahaha.
Other fails - carby motor that doesn't move and screams worse than my 1 year old nephew at 60. Had to fill up 4 times. Gear ratios on thin ute defiantly not for highway use. NEVER AGAIN lol!
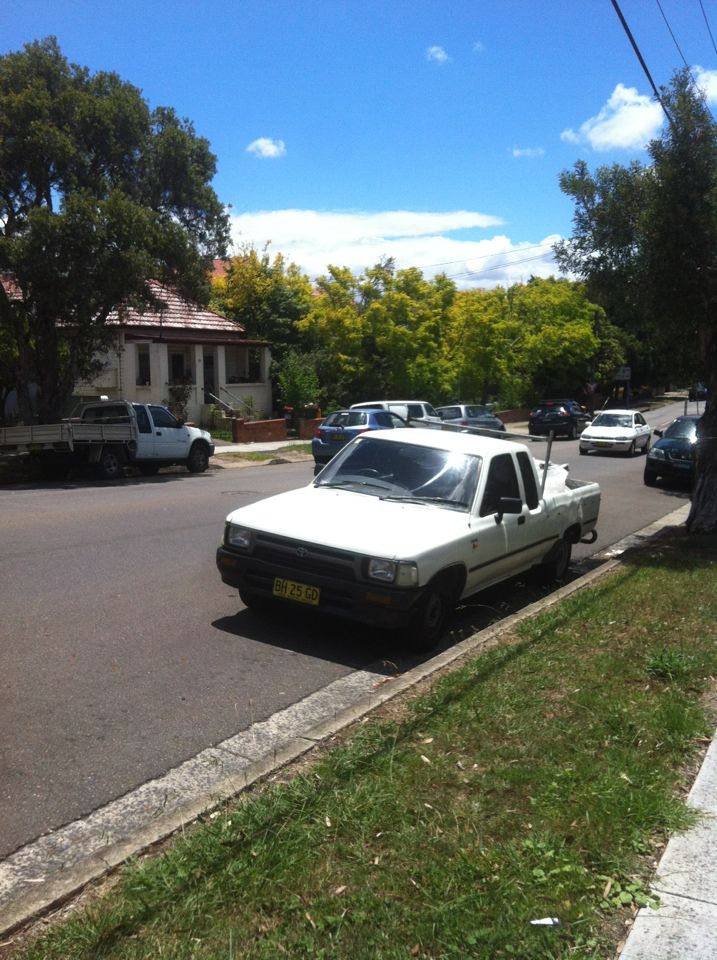
Got there around 1-2 and paid the man!
It was official, a receipt, the keys and a big smile on my face.
The ct70 was mine, never had seen one in person so I was like a kid at Christmas.
Drove back to sydney, much better drive back. It defiantly felt good to be home after 12-13 hours on the road. I sat in front of the bike with a notepad and started noting down what I saw I needed to do and buy.
Here is how she sat when I bought her

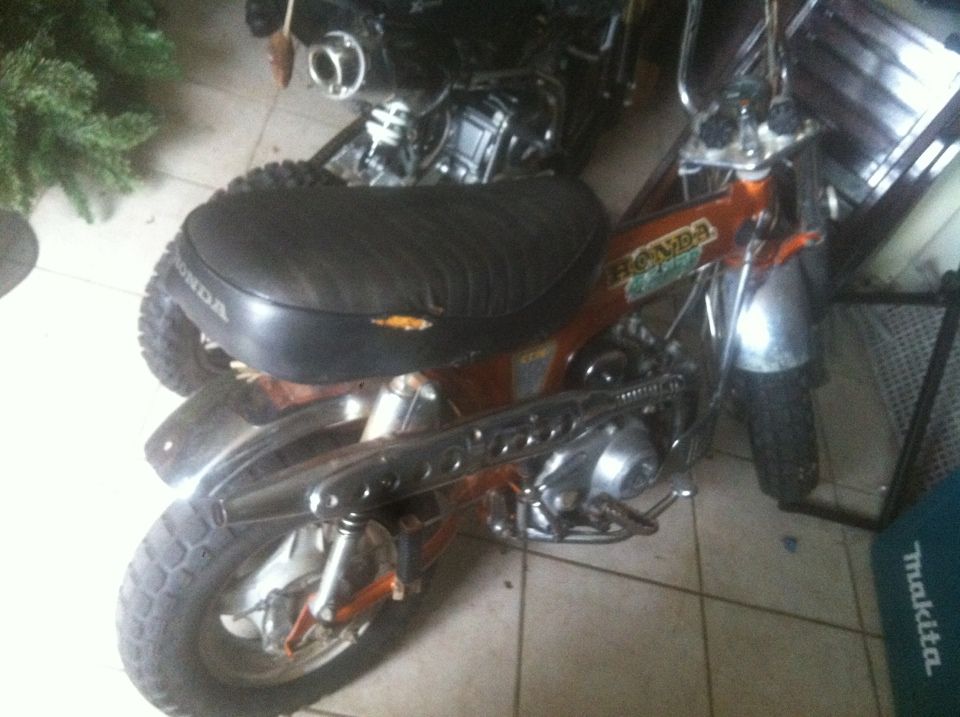
Things wrong/missing:
-front indicators and indicator stem missing
-Tail light bracket, tail light, Rear indicators missing
-Key to ignition different to helmet lock (previous owner had lost it)
-snapped brake lever and cable (front)
-throttle cable worn
-rear brake switch spring missing
-indicator switch console missing
-damaged front fender
-minor dent on rear fender
-frame handle missing
-seat torn and rusted underneath
-rubber battery flap missing
-exhaust heat shield dented
-steering stem bearings felt sticky and worn
-headlight ears/fork top covers dented
-broken right fork reflector
And along with some very minor surface rust on some of the chrome pieces.
I'm sure I've missed a few little things but that's all the big stuff that needs attending/replacing. The rest was just dull and dirty from years and years of storage.
The lights were not working when I had bought it but I knew that wouldn't be a huge issue to fix seeing as though the battery looked to be at least 20 years old and wiring kits were readily available online.
After a few busy days at work I took some time to start this build and see what else was needed in the spots I hadn't looked yet.
The stripping process had begun!
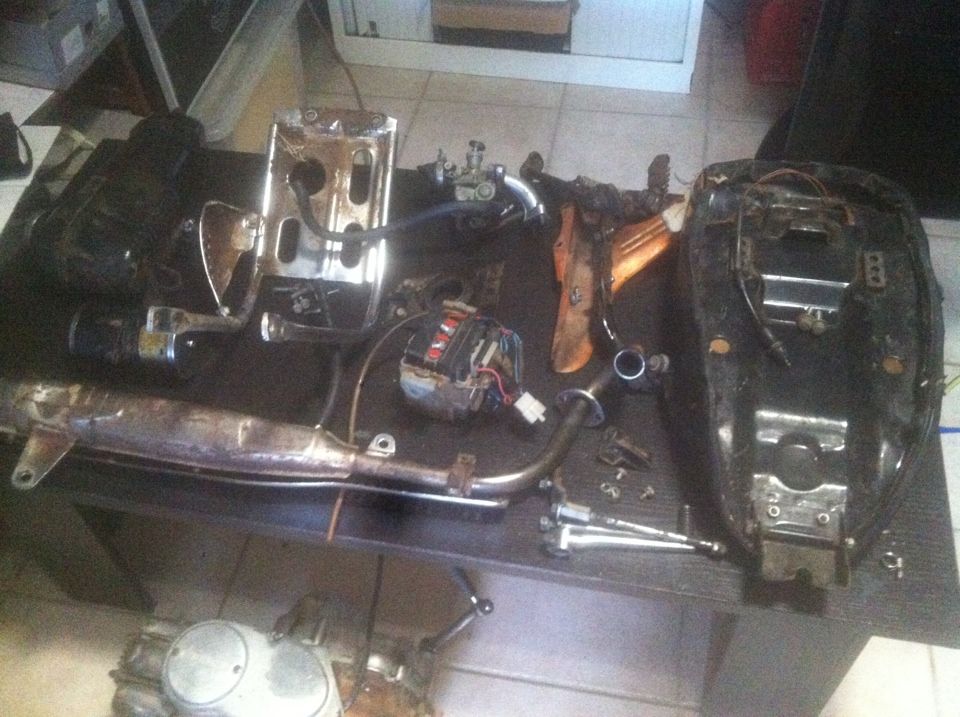
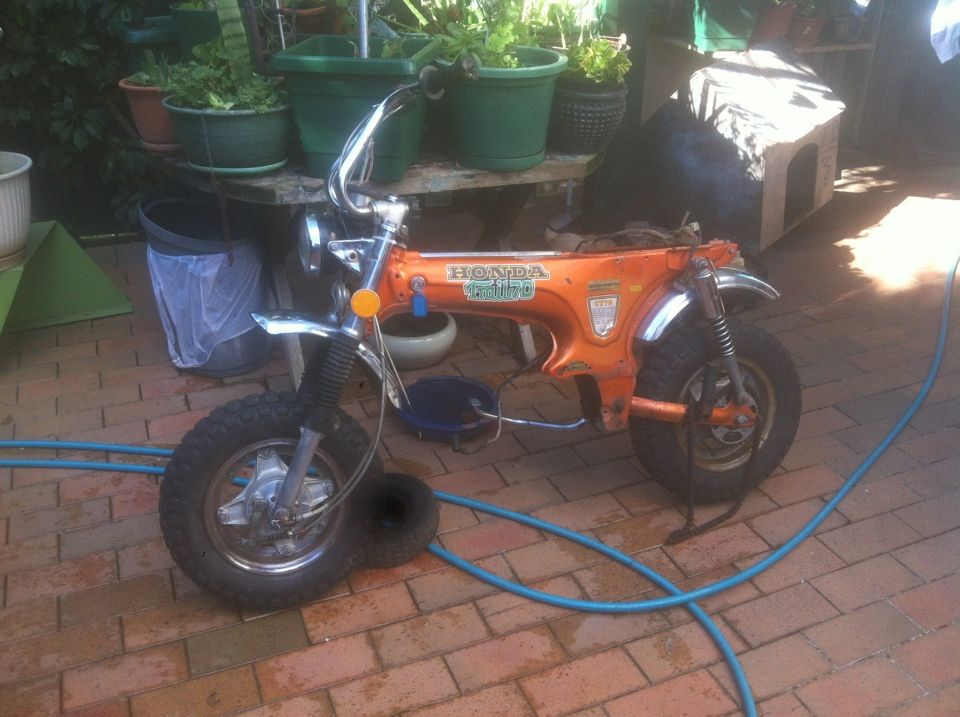
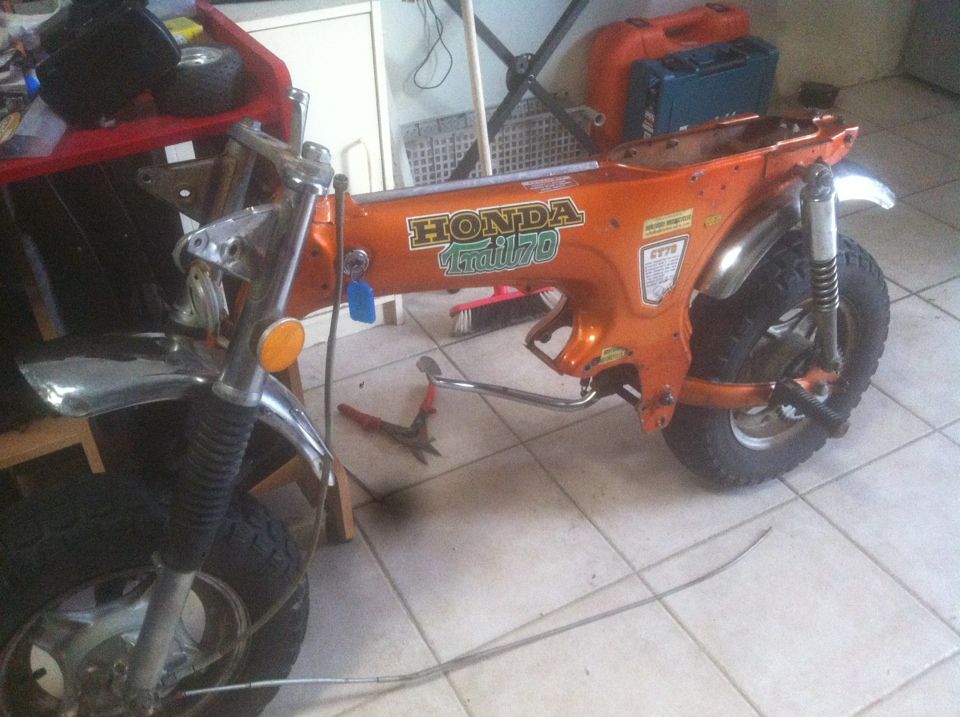
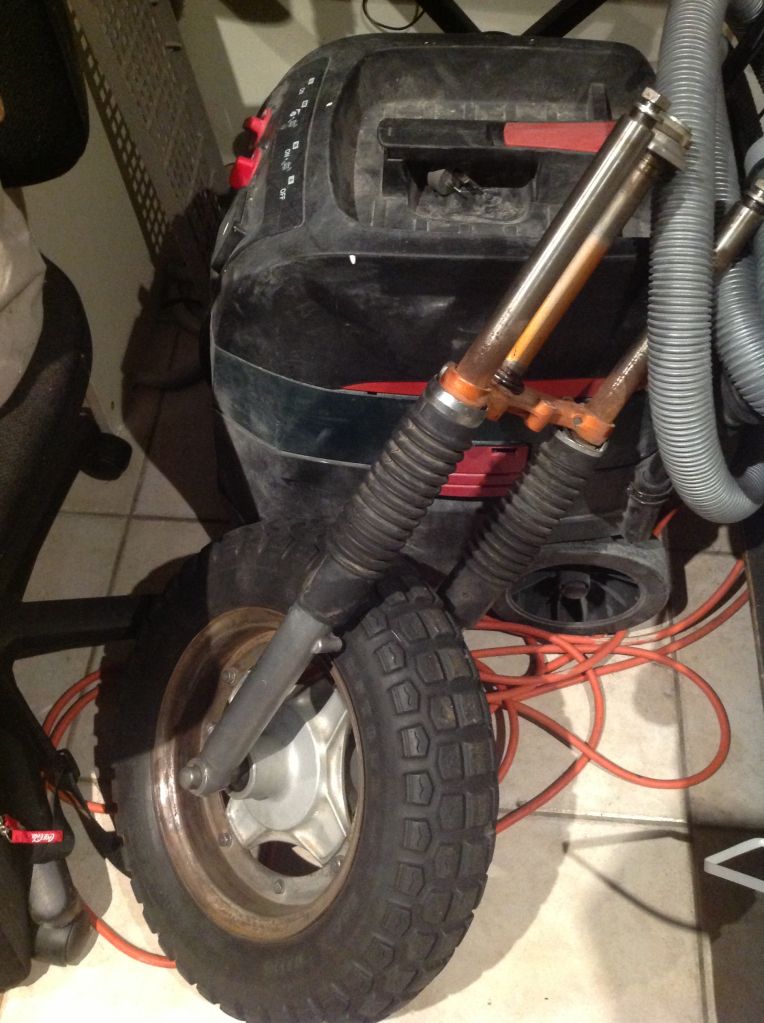
Front forks are in great nick, just in need of some polishing, some new oil and seals. Will be kept aside to restore this bike back to 100% original one day.
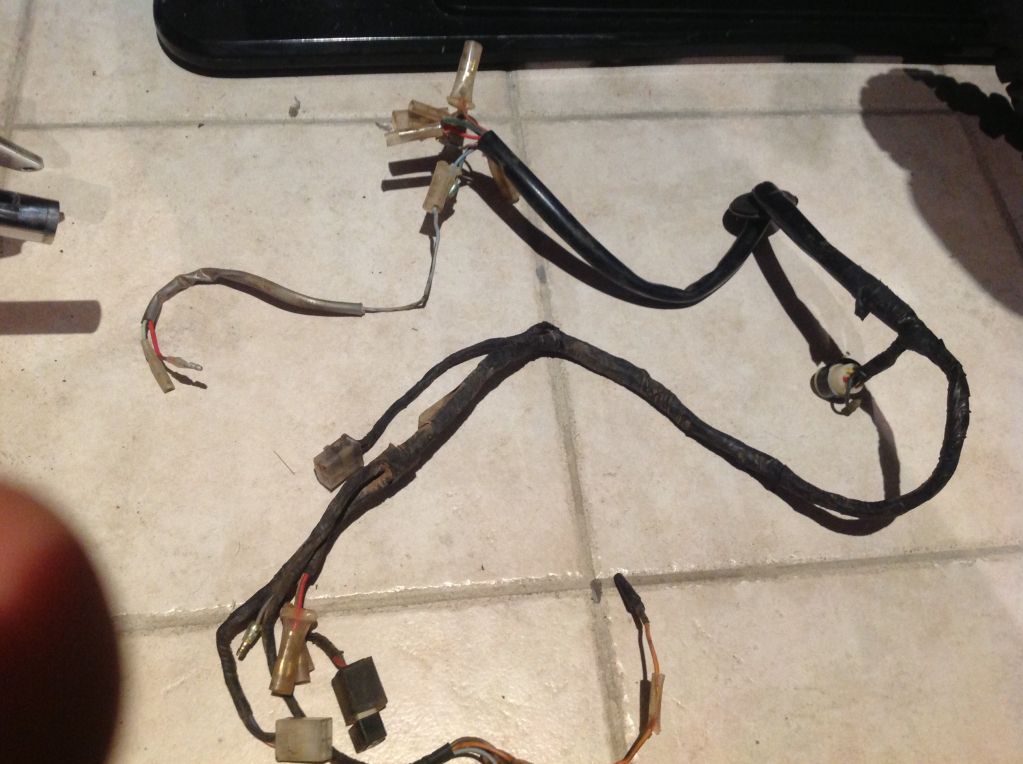
Like I thought. The wiring loom is in excellent condition and won't need to be replaced. No cut wires anywhere. Just some that have been added by someone in the past for some strange reason.
Seeing as the plan for now is to restore the bike to OEM standard (for now) I will keep the 6v electrics.
[more soon, just writing up pt 2 and uploading pics]
I'll reveal the k0 sapphire st70 soon also
-Daniel
I'm Daniel. New to the honda mini-bike scene but not so new to the pit bike scene.
I hope to meet some new friends and mini bike fanatics. I'm always looking to help where I can, all your feedback and insight would be great!!
Having owned 4 pit bikes 3 in the past and one currently I defiantly knew my way around the problems these bikes commonly suffer and didn't find servicing and modifying at all difficult. Have always loved the simplicity of mini bikes and pit bikes.
Still have a tonne of parts in the shed, enough to build a bike. But I'm no bike restorer/builder
-1st gen atomik 125cc semi auto (ducar engine) talking mid (2005)
-provert 140cc (2006) manual
-assassin 140cc (2010)
-atomik nitrous 160cc (my current bike) (2012)
About a month ago I happened to be on the market for a motovert rx125 which I was going to register and modify to be a fun little suburban machine, until I found what was to be a 1974 Honda ct70.
I hadn't ever seen anything quite like it. It was new to my eyes and I simply couldn't stop looking at its potential. I always knew about the z50s but never these things!
I searched them up on google, and found that there was a huge market for these overseas and they were road registrable. Further research lead me to find some cool forums such as this one. I was defiantly keen on showing everyone what I can do. Seeing as though there's a huge scene on vintage honda minis.
After I saw the huge amount of parts on the market I was now well off the idea of the motovert and had to have this ct70. So this would be my first ever restoration project and build.
The particular one I was looking at was on eBay. Still 3 days remaining and I was worries as there were 33 bidders already. Keeping my head high I placed my highest bid and 3 days later I had won the bike only just.
I was now the owner of a k3 1974 candy topaz orange ct70
But the bike was in Wagga Wagga and I'm in sydney so it wasn't going to be a trip in the park pick up. My 4wd was off at the mechanics until the following week and I defiantly didn't want to wait that long.
Planned the trip for that Saturday and left for Wagga at 6am. Other than hitting a wombat at highway speed and blowing a tyre at goulburn. The trip in my dads 1986 Toyota hilux automatic 3 speed (scrap metal ute) was ok. Oh what the hell!!
Let me just say, I won't do a drive like that again without the comfort of cruise control and the peace and quiet of new door and window seals hahaha.
Other fails - carby motor that doesn't move and screams worse than my 1 year old nephew at 60. Had to fill up 4 times. Gear ratios on thin ute defiantly not for highway use. NEVER AGAIN lol!
Got there around 1-2 and paid the man!
It was official, a receipt, the keys and a big smile on my face.
The ct70 was mine, never had seen one in person so I was like a kid at Christmas.
Drove back to sydney, much better drive back. It defiantly felt good to be home after 12-13 hours on the road. I sat in front of the bike with a notepad and started noting down what I saw I needed to do and buy.
Here is how she sat when I bought her
Things wrong/missing:
-front indicators and indicator stem missing
-Tail light bracket, tail light, Rear indicators missing
-Key to ignition different to helmet lock (previous owner had lost it)
-snapped brake lever and cable (front)
-throttle cable worn
-rear brake switch spring missing
-indicator switch console missing
-damaged front fender
-minor dent on rear fender
-frame handle missing
-seat torn and rusted underneath
-rubber battery flap missing
-exhaust heat shield dented
-steering stem bearings felt sticky and worn
-headlight ears/fork top covers dented
-broken right fork reflector
And along with some very minor surface rust on some of the chrome pieces.
I'm sure I've missed a few little things but that's all the big stuff that needs attending/replacing. The rest was just dull and dirty from years and years of storage.
The lights were not working when I had bought it but I knew that wouldn't be a huge issue to fix seeing as though the battery looked to be at least 20 years old and wiring kits were readily available online.
After a few busy days at work I took some time to start this build and see what else was needed in the spots I hadn't looked yet.
The stripping process had begun!
Front forks are in great nick, just in need of some polishing, some new oil and seals. Will be kept aside to restore this bike back to 100% original one day.
Like I thought. The wiring loom is in excellent condition and won't need to be replaced. No cut wires anywhere. Just some that have been added by someone in the past for some strange reason.
Seeing as the plan for now is to restore the bike to OEM standard (for now) I will keep the 6v electrics.
[more soon, just writing up pt 2 and uploading pics]
I'll reveal the k0 sapphire st70 soon also
-Daniel


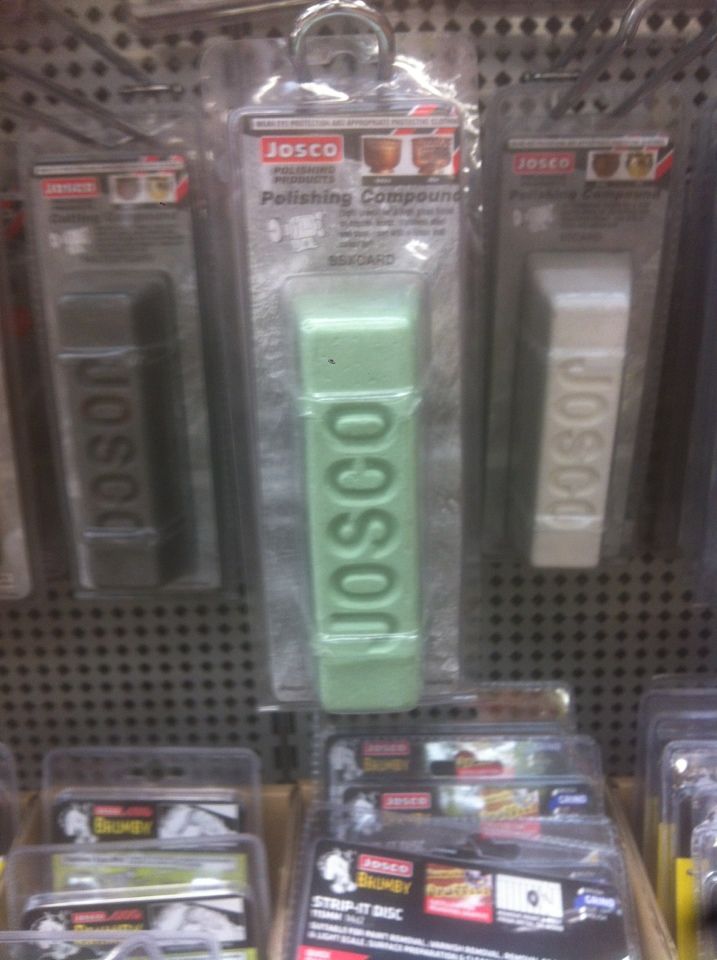


 wish I had these when I was doing it before! Now I have them for my next build and re-assembly ! I love polishing, it's defiantly my new skill