Forum archiveWorkshop Manual
This is a read-only archive of the ST70.net forum (2009–2021). Posting, accounts and private messages are no longer available.

head tube

Started by wayne · 18 replies · 6578 views

wayneStandard MemberPosts: 54
Joined: Feb 2012
hi all, well ive finally got me frame shot blasted, ive noticed a small tab that is welded to the bottom of the head tube, and at the top of the head tube there are two tack welds where something as been, i realise its for the steering lock, but is it the same as the bottom tab, or does it have a hole for the steering lock bolt to go through, any pics would be great
thanks wayne
WaynusModeratorPosts: 1108
Joined: Feb 2009
I guess you're talking about the little blok that prevents the handle bars from bumping into your frame.
(A turning "stop")
ChiefStandard MemberPosts: 148
Joined: Oct 2011
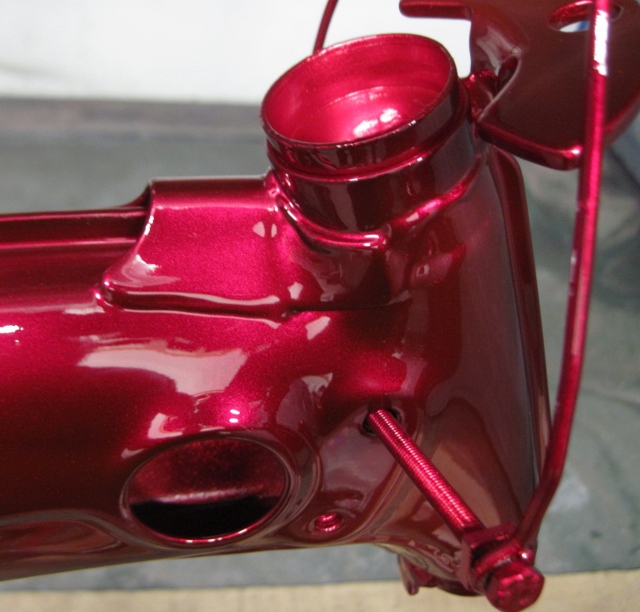
Heres a picture of my '73 headstock after refinishing,it shows steering lock bracket and steering stop at the lower rear.

Attachments

IMG_0151a (640x612).jpg
wayneStandard MemberPosts: 54
Joined: Feb 2012
hi, blimey thats a fair size piece, can you buy them, the hole as to be bang on i guess to line up with the bolt on the lock, very small amount of weld for quite a large piece, i'm a welder and i would have put runs top and bottom on it, lovely colour that is, is it wet painted or powder coated, i was going to usea base coat then put the decals on then a laquer coat, i'm told with powder coat you carn't laquer over the decals
ChiefStandard MemberPosts: 148
Joined: Oct 2011
Yes its quite large for whats required really.You cant buy it seperately so you would have to make it unless you can find a scrap frame to cannabalize. fit new bracket and locate with steering lock pin thru hole or weld to frame first then drill hole for lock pin,choice would be yours.
Stress applied would only be a shear force applied by turning of the handlebars (by would be thief)so no great strength needed really,though I'm sure mine is welded top and bottom.
Paint is a true candy finish,6 coates of candy red over 2 coats of coarse metalic silver followed by 3 of 2k clearcoat.
Shotblasted and flapwheel/handfinished finshed first followed by etch primer then a couple of high build 2k primer.
Colour is slightly different in the picture due to flourescent lighting,its actually very close to original,maybe a bit deeper and richer,
cheers,
Dave
wayneStandard MemberPosts: 54
Joined: Feb 2012
hi again, i'm going to make one, yours in the pic looks to be pretty central to the head tube, the hole for the steering lock bolt is as far as the travel can go to the left, so i'm going to move the bracket round to the right but keeping the hole where it should be, my thinking is that the bracket should be above the steering lock bolt on all locks,just incase the locking bolt should operate by accident for some reason,
ChiefStandard MemberPosts: 148
Joined: Oct 2011
I can take some more pictures if you want,let me know and I'll take my camera to my workshop tomorrow.
wayneStandard MemberPosts: 54
Joined: Feb 2012
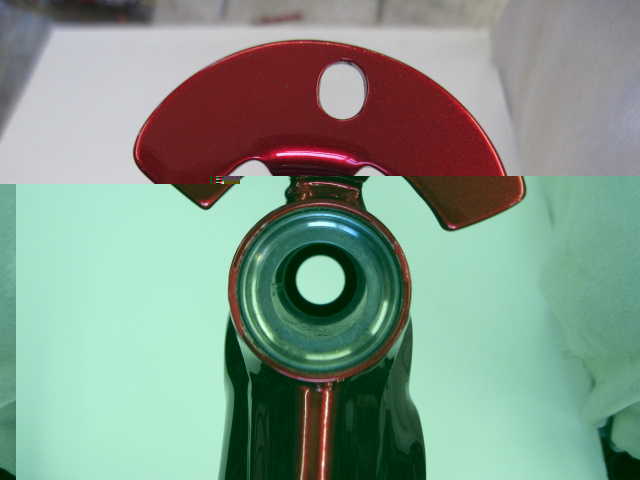
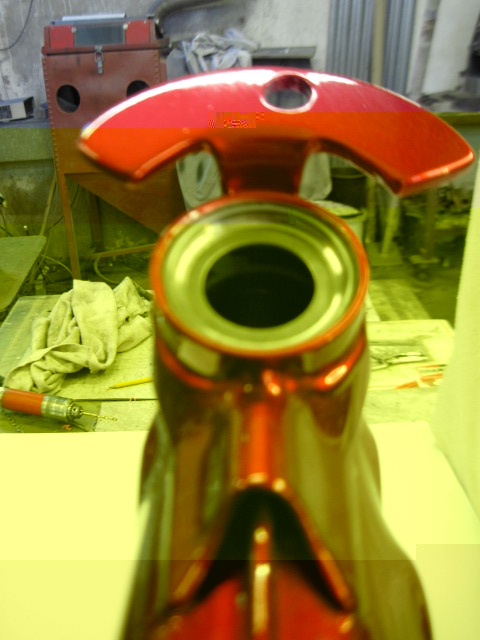
hi, yes that would be great, a plan view would be useful, and one to show the height it is set at
thanks wayne
ChiefStandard MemberPosts: 148
Joined: Oct 2011
Wayne,
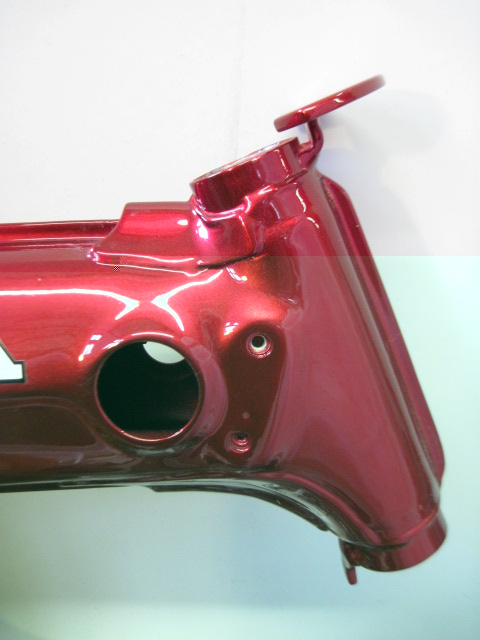
Some pictures as promised,should provide all info required but please ask if you need anything more,
Cheers,
Dave

Attachments

IMG_0718 (480x640).jpg
IMG_0719 (640x480).jpg
IMG_0720 (480x640).jpg
wayneStandard MemberPosts: 54
Joined: Feb 2012
them are great, just the job, i can make it from them no problem
thank you very much

‹ Back to Technical